There are many ways to create an original string flowerbed. Some of them are more time-consuming, others less so. The flowerbeds we have presented here are quick and easy to make.
Flowerbeds made of strings fit perfectly into the climate of modern homes. They give them, above all, coziness, but also character. Even in small apartments you can easily create a special atmosphere with a hanging flowerbed, which is in keeping with the currently fashionable interior design trend – the so-called urban jungle. What do you need to create such a flowerbed? How do I make one?
Method 1
What do you need?
First of all: cotton string. You will also need scissors, a metal wheel, a tape measure or a ruler and a pot with a plant.
Making
First, measure out four strings, each 3 meters long, and then fold them in half (each string should be 150 cm long when folded)
Thread each string through the metal circle at the folding point. Then, grab all the strings together and tie a knot as close to the circle as possible, then spread the strings out in parallel
The next step is to measure a distance of 50 cm from the circle. Once you’ve done this, tie a knot at this distance, one on each pair of strings
Measure the height of the pot and again spread the strings so they are parallel.
Then, from the first knots, measure a distance smaller than the pot and make knots at the measured distance by tying strings from adjacent pairs.
Then tie the outer, un-tied strings together to form a sort of net.
You can now insert the pot into the net and check that the knots are properly placed.
Ask someone to hold the pot at the correct height.
Take all the strings in your hand and make a knot on them under the pot in the middle.
You can shorten the other strings if they seem too long to you.
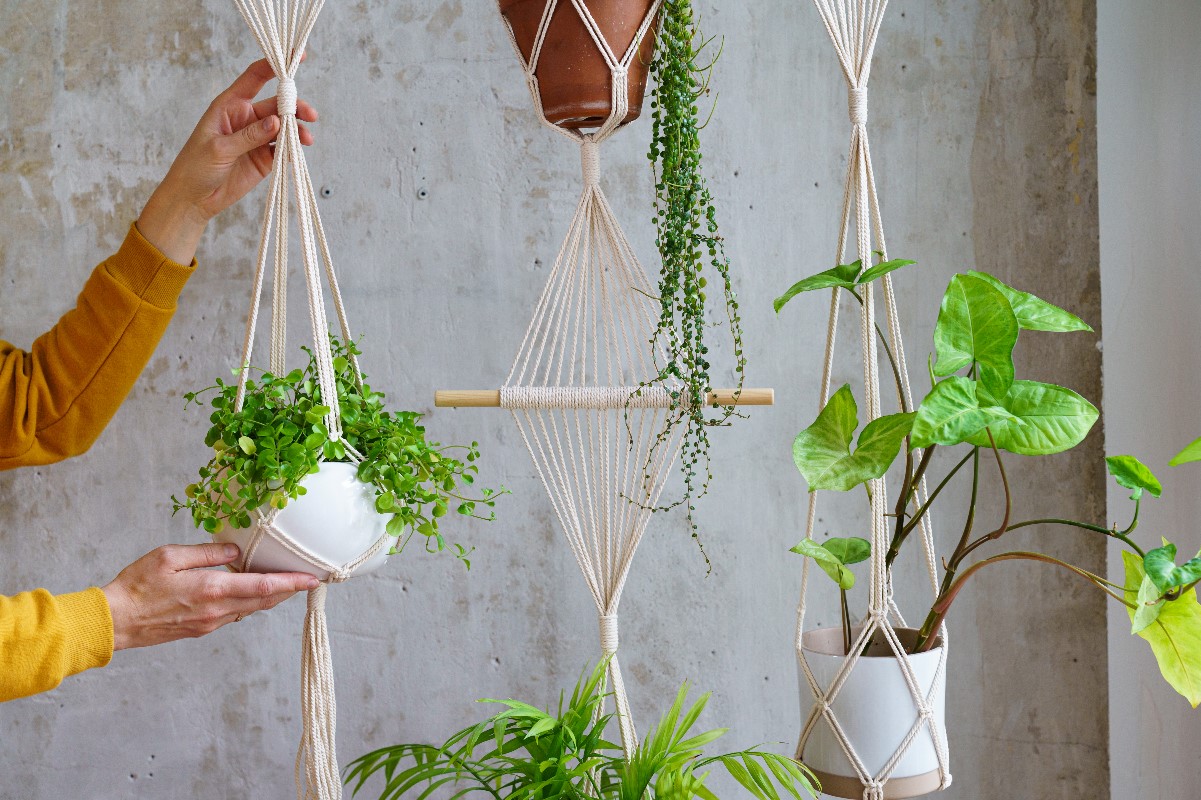
Method 2
What you need
For this flowerbed you will need 3mm thick cotton string. Other things you’ll need are: a stick for weaving the flowerbed (no shorter than 16 cms) hung on something sturdy, scissors, a measuring tape or ruler and a plant pot.
Making
Cut 10 pieces of string about 240 cm long.
Attach the string to a stick. You can do this with a grosgrain knot: fold the string in half, put a loop over the stick and insert the loose ends of the string into it. Repeat this with all 10 strings.
Start braiding with a flat knot: use 4 adjacent strings. The middle two are the main strings and the two outer strings are the braiding strings. Start by passing the right braiding cord under the main cords, then lay that cord over the left braiding cord.
This will create a loop on the right side of the main strings into which you will insert the left braiding cord.
Next, pull on the braiding strings so that you tighten them on the main strings. Remember not to make it too tight.
The next step is a mirror image of the previous one. Place the left braiding cord under the main strings and over the right braiding cord, then place the right braiding cord into the left loop and tighten.
Repeat the process on each pair of strings (you should have a row of five flat knots).
The next row should consist of four flat knots. Start tying them by lowering the two outer cords. The braiding strings are the ones that were the main strings the floor above (and vice versa).
The next row will be exactly the same: the strings will swap roles.
Braid in this manner until you reach the desired length.
Make a flat knot from the middle strings. It has to be about 5 cm lower than the previous ones. The next two knots will be 2 cm lower
Make a flat knot with the completely outer (main) strings. The braiding cords here will be the next two. The place to make this knot is good to adjust by fitting it to the pot.
Grab the two cords coming out of the knot on the right side and the two that are in the back, tie them together. Do the exact same thing symmetrically on the left side.
Go back to the right side. Again, grab the two outer strings of the previous knot and the next two strings from the back. Repeat on the left side.
Grab the outer two strings of the knots made in the front of the flowerbed and the two outer strings of the knots made in the back. Braid them in the same way as before. Proceed symmetrically on the other side.
Grab the strings from the two front side knots to create another one under the middle knot in the front.
The last step is to finish under the pot. Attach one side of the wrapping cord to the cords you are holding and create a loop, and wrap the rest of the cord around the whole thing, starting from the bottom to the top.
After making a few laps, put the end of the string through the loop you created at the beginning. Take the opposite end of the braided cord and pull it so that the loop with the end inserted into it “hides” under the braided cord. If any part of the string doesn’t fit, cut it off.